Building a telegram bot that extracts text from images and documents using Azure Cognitive Services.
I was recently applying for my passport and was required to provide passport numbers for my parents. Problem was, they both misplaced them and the only option left was to visit a government office to have the numbers manually retrieved since my parents applied for passports before digitization. I had to wait for an hour before they could trace the numbers. As I sat there waiting, I couldn't help but wonder if the government could leverage current technology to digitize the documents that are still in hard copy. Although the government will not be using telegram, the approach used here has an endpoint that makes it interoperable with any system that accepts REST endpoints.
For the visual learners, find a video walkthrough of this tutorial here
Demo
What we will be building 👇🏾
Prerequisites
Familiarity with python
Azure account - Create an azure account here
Python 3.8+ - Install python from here
Pip - Install python from here
Telegram account - Install python from here
Project structure
ProjectFolder
│main.py
│app.py
│.env
│.gitignore
 | requirements.txt
└───images
│   │   abc.png
│   │   chinua.jpg
│   │   story.pdf
│   │   wams.png
Creating an azure cognitive service
Signup for an azure account here
Once logged in, click on the plus create resource

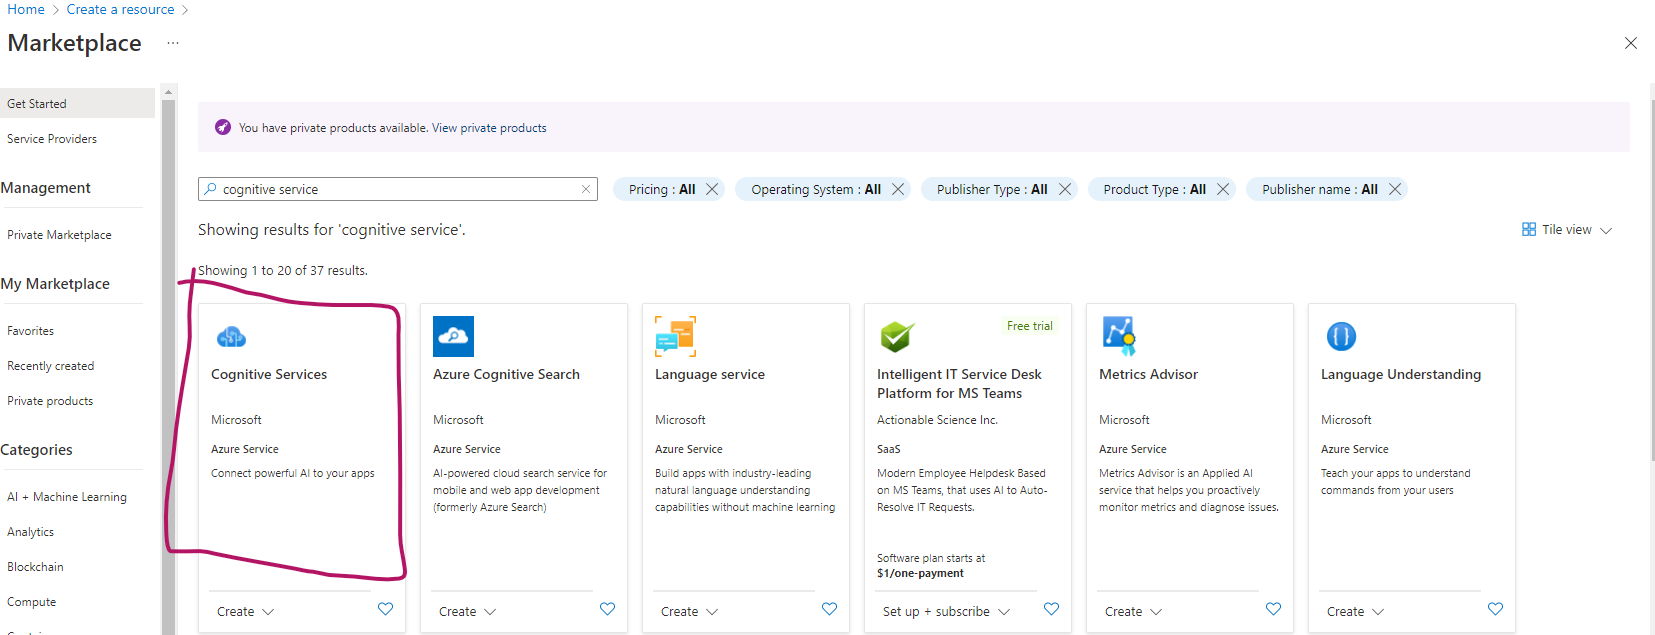
Search for cognitive services

Select cognitive services
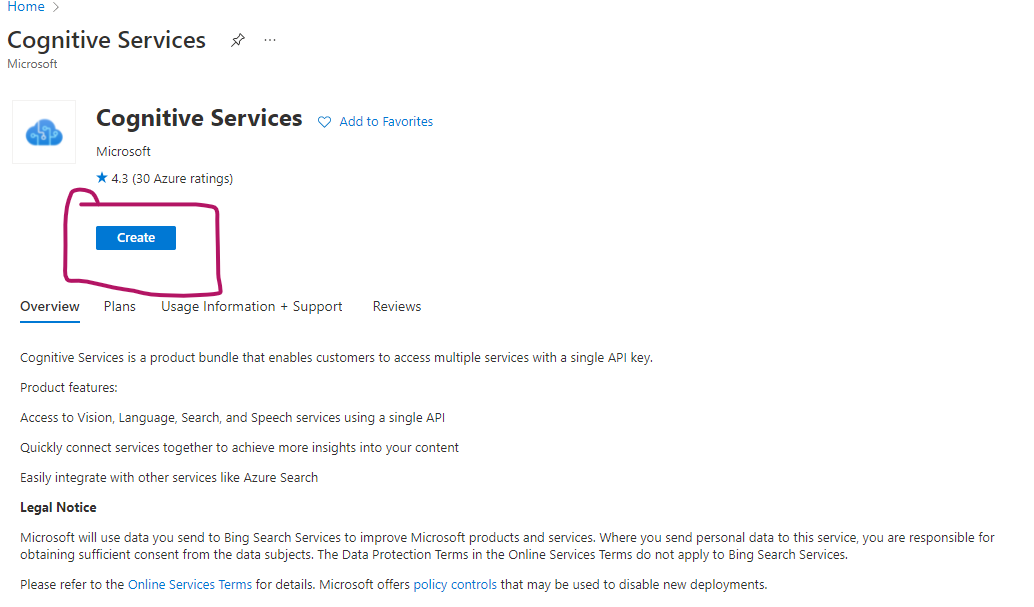
Create the resource
If you do not have a resource group created yet, click on the create new below the resource group input. On the name field, make sure to give a unique URL of your project. Azure will let you know when a name is taken.
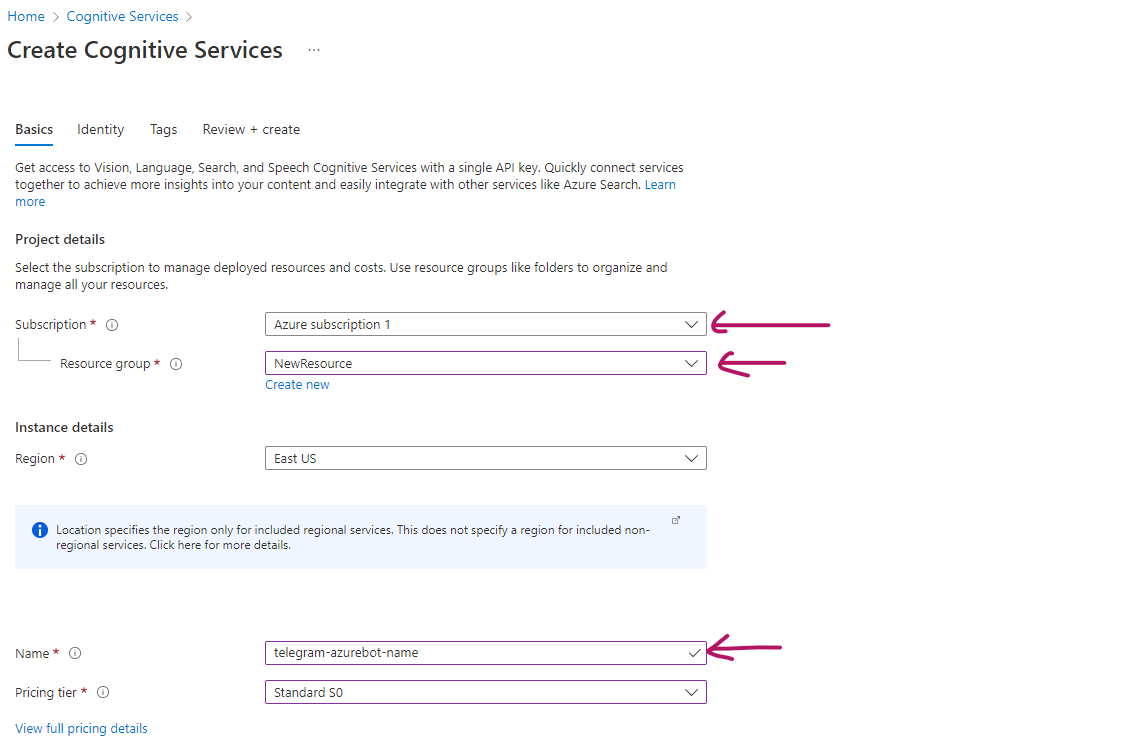
I did not make any changes on the Identity or tags tab and went straight to the Review+Create tab and clicked on create at the very bottom.
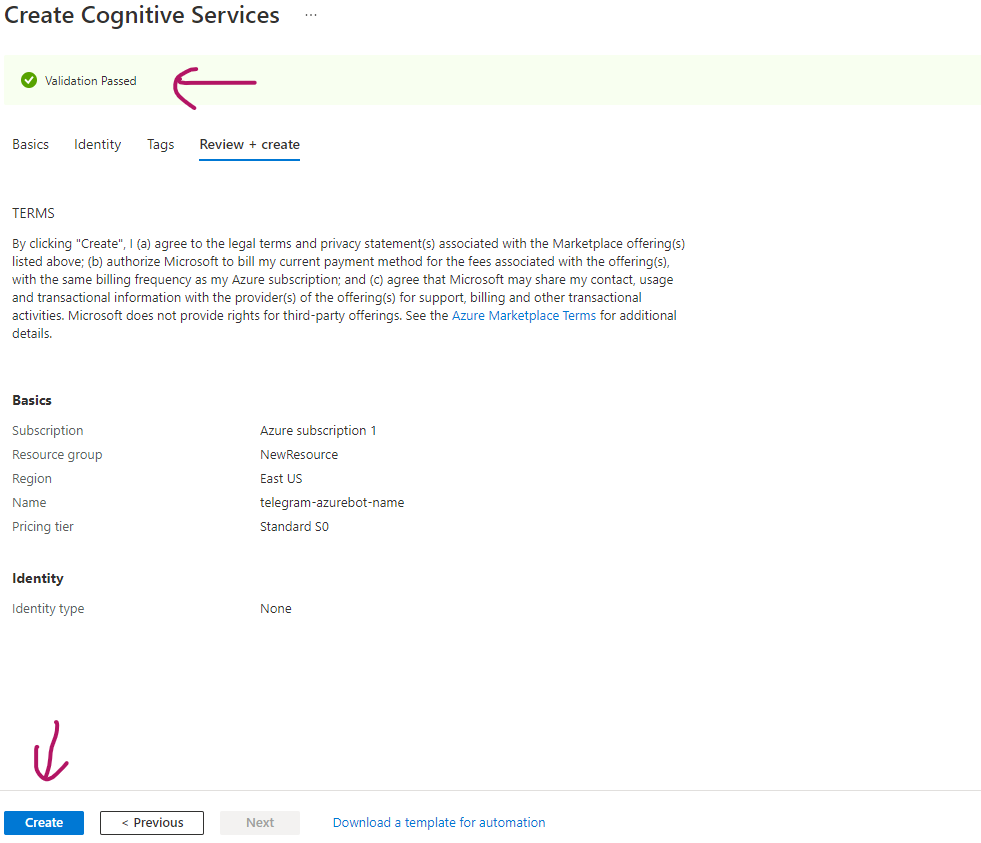
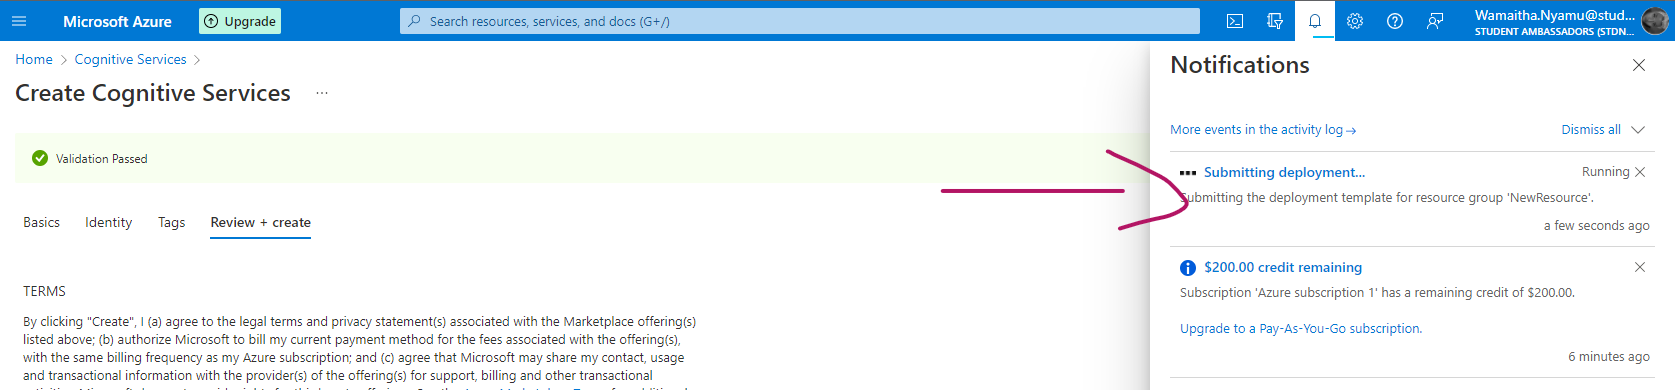
You can check the progress of your deployment on the notification bar that can be accessed using the bell icon on the navbar to the right.
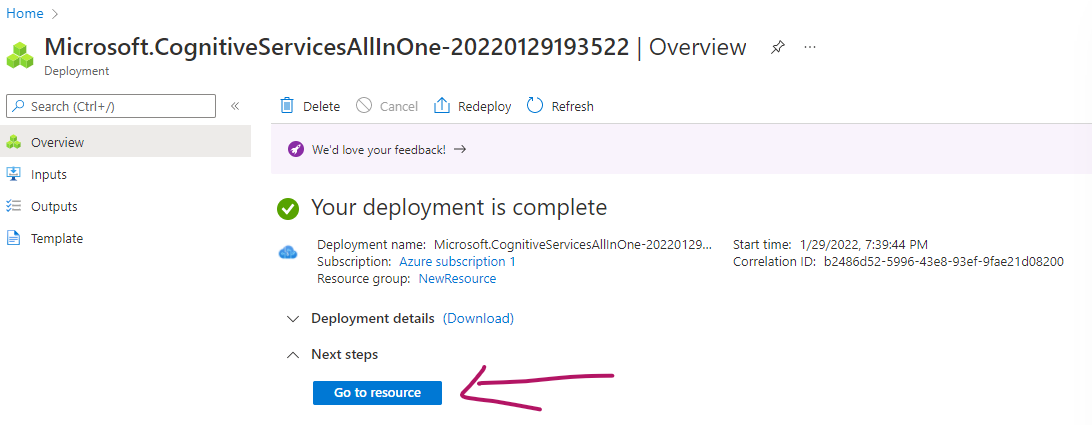
Viola! Once your deployment is done, click on Go to the resource.
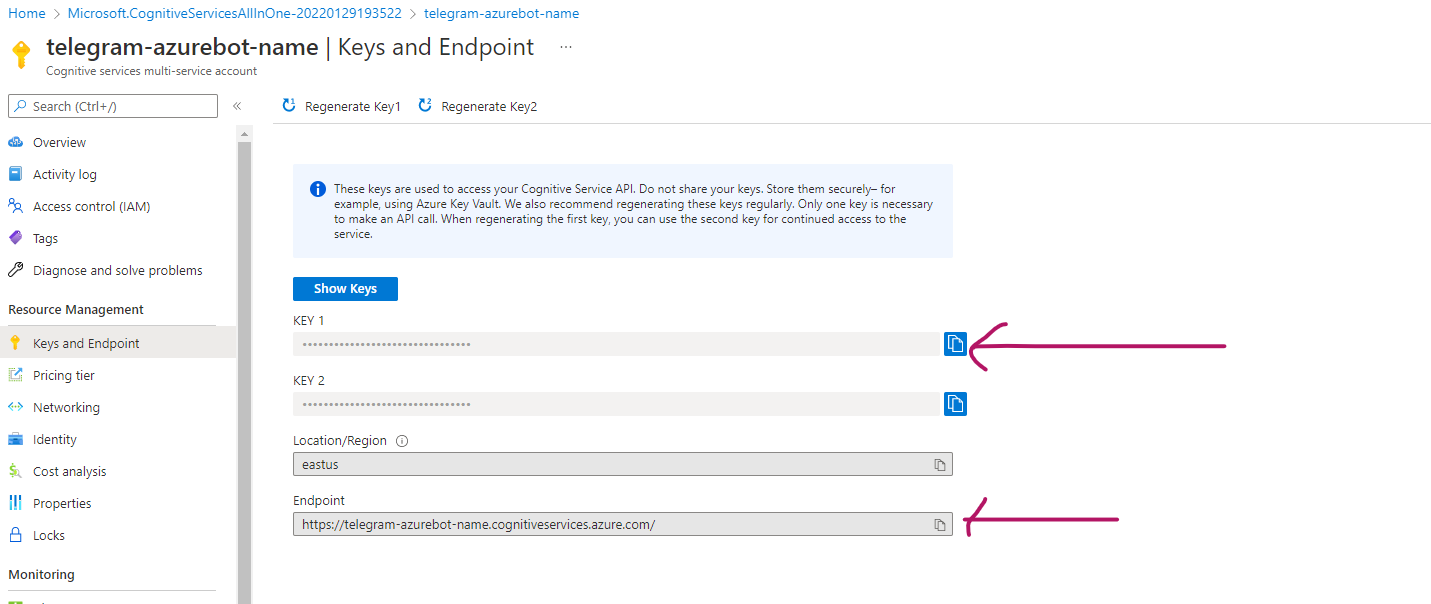
We need two important things that will enable us to connect with azure from python. A key and our API endpoint. Click on manage keys .
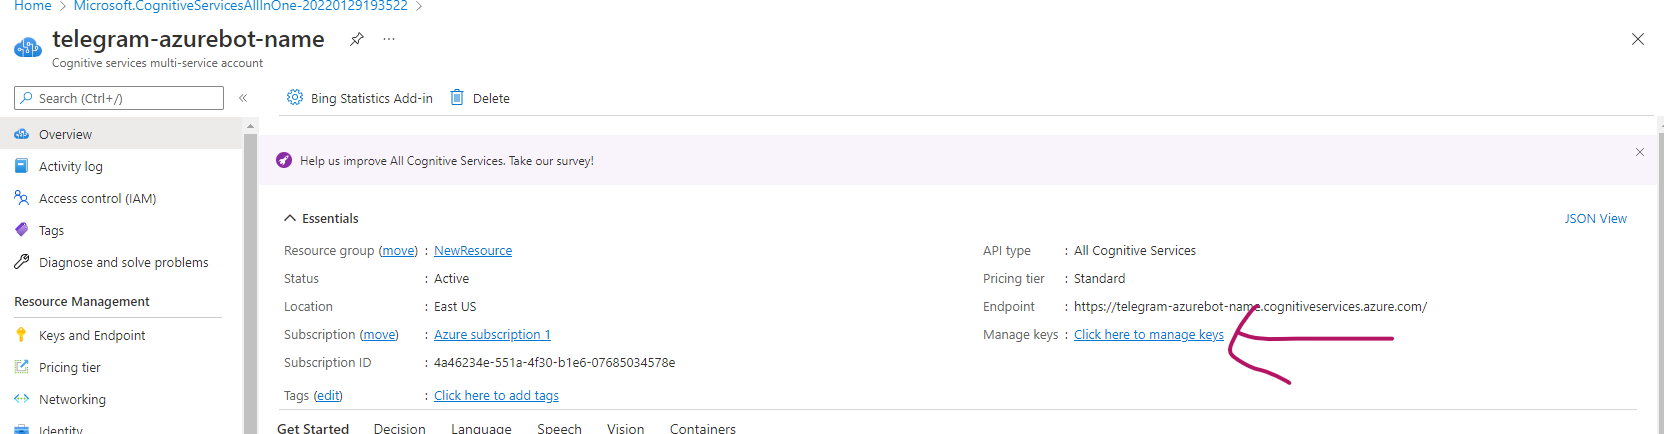
This takes us to the page where we can access two keys and an endpoint URL.
Environmental variables
Azure Keys
On your IDE, paste any one of the two keys and the endpoint in your .env. Keep the format as follows:
COG_SERVICE_ENDPOINT=your_azure_endpoint_goes_here
COG_SERVICE_KEY=your_azure_key_goes_here
Telegram Token
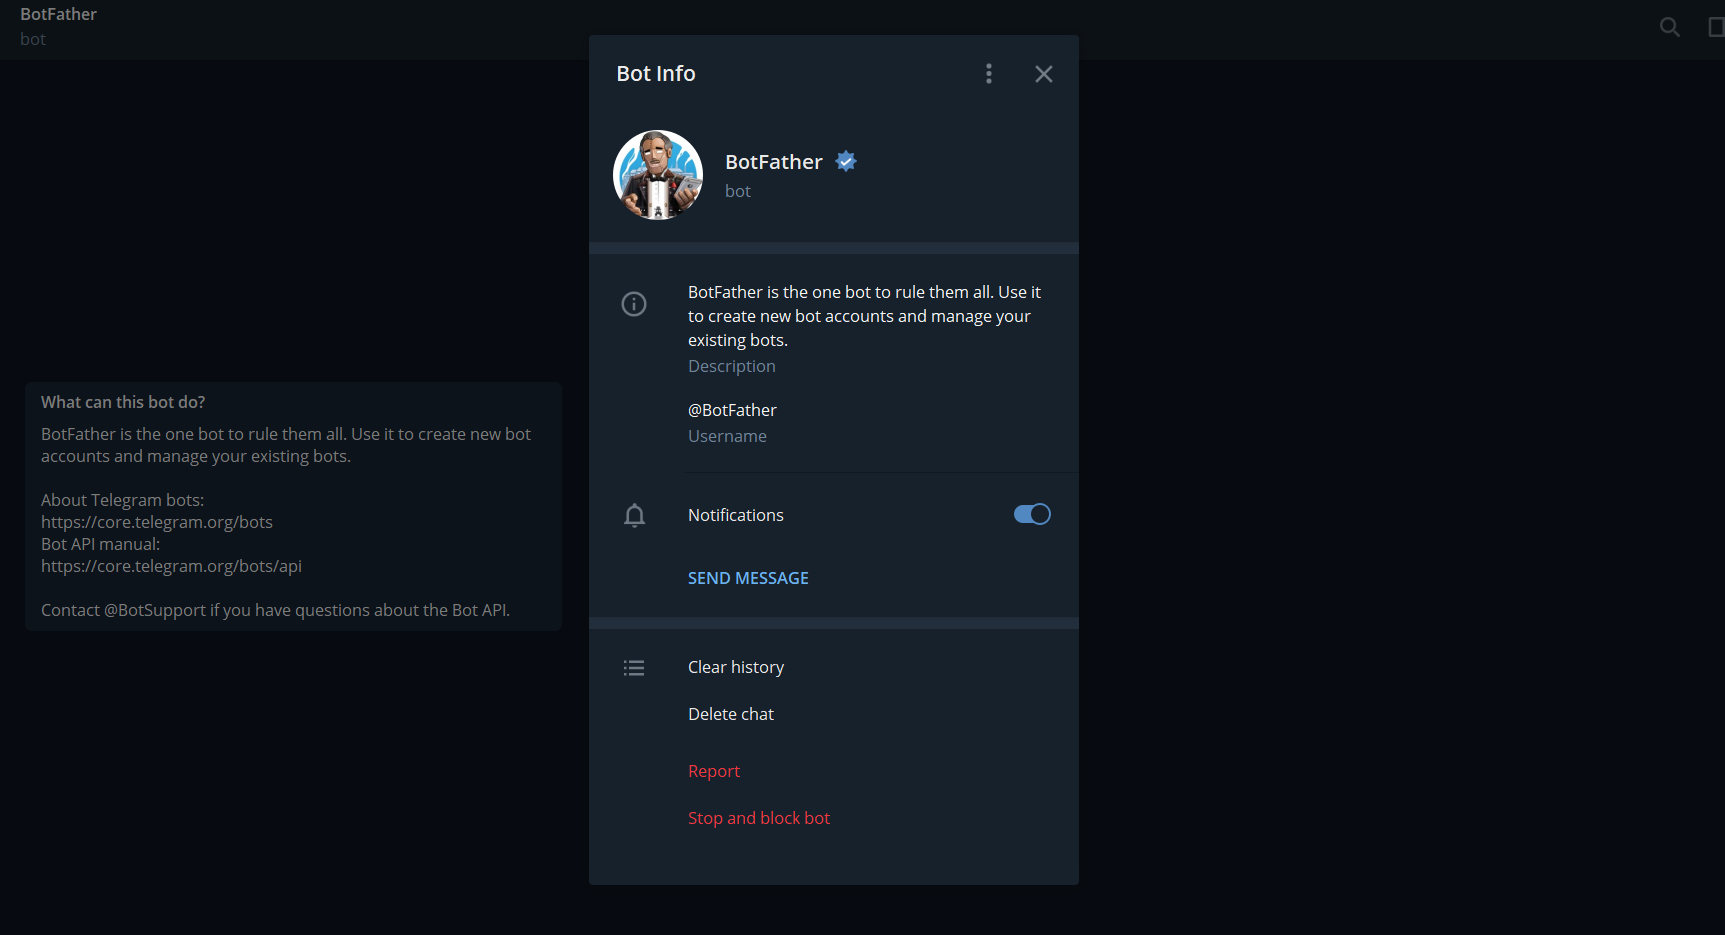
Search the BotFather on telegram or access it from here There are very many fake accounts so please make sure the profile looks as below:
To create a new bot send a /newbot message to the botfather.
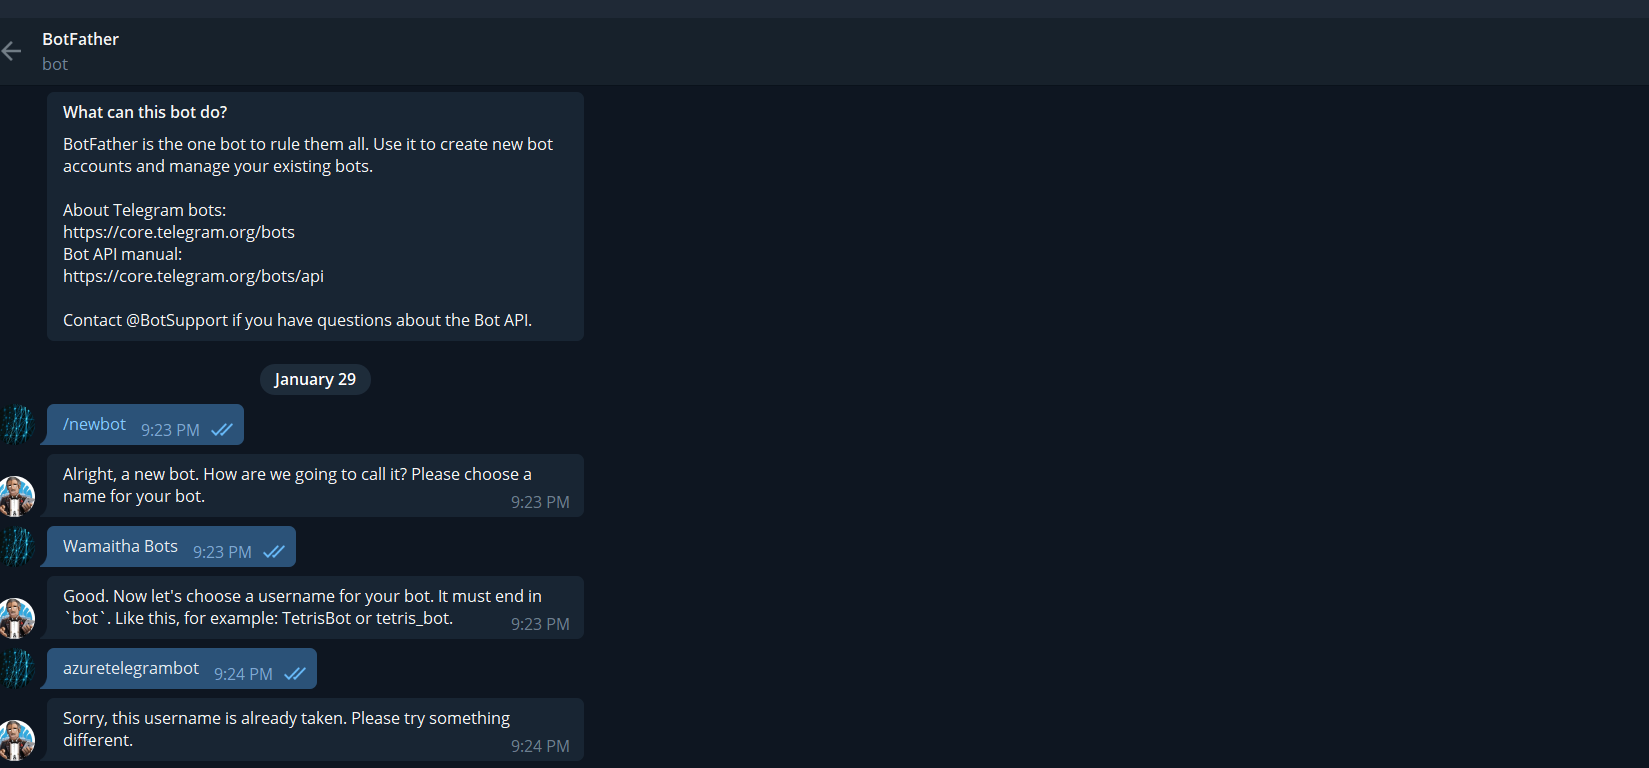
You might need to keep trying for an available username. Once you do, copy the token to your .env.
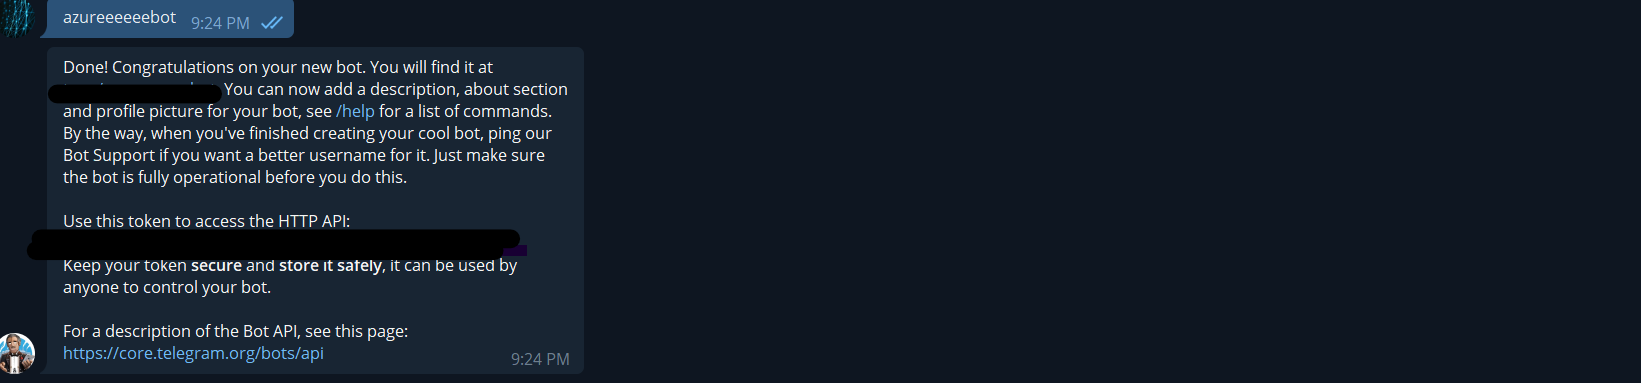
COG_SERVICE_ENDPOINT=your_azure_endpoint_goes_here
COG_SERVICE_KEY=your_azure_key_goes_here
TELEGRAM_TOKEN=your_telegram_token_goes_here
If you will push this code to a codebase, add the .env file to the .gitignore to avoid exposing your keys to the public.
Installing dependencies
Next up, we will install all the dependencies needed to run the project.
Add the following in your requirements.txt
Pillow == 8.3.1
matplotlib == 3.5.1
python_dotenv == 0.17.1
flask == 2.0.2
python-telegram-bot == 13.10
azure-cognitiveservices-vision-computervision==0.7.0
requests == 2.27.1
Open a terminal from the project folder and run : sh pip install -r requirements.txt This installs are the packages needed to run this project. A summary of what each package does:
Pillow: Imaging Library
Matplotlib:plotting package
python_dotenv: Read key-value pairs from a .env file and set them as environment variables
flask :A simple framework for building complex web applications.
python-telegram-bot: Python wrapper for the official telegram API
azure-cognitiveservices-vision-computervision :Microsoft Azure Cognitive Services Computer Vision Client Library for Python
requests :Python HTTP for Humans. Now we are ready to write some code
Difference between READ API and OCR API
The OCR API uses an older recognition model, supports only images, and executes synchronously, returning immediately with the detected text. The Read API uses an updated recognition model, takes an image or PDF document as the input, and extracts text asynchronously. But supports fewer languages The READ API also works page by page then line by line then word by word whereas the OCR works region by region then line by line then word by word. In terms of API response, the OCR API's response looks as follows:
{
  "language": "en",
  "textAngle": 0.00000,
  "orientation": "Up",
  "regions": [
    {
      "boundingBox": "462,379,497,75",
      "lines": [
        {
          "boundingBox": "462,379,497,74",
          "words": [
            {
              "boundingBox": "462,379,41,73",
              "text": "Hello"
            },
            {
              "boundingBox": "523,379,153,73",
              "text": "World!"
            }
          ]
        }
      ]
    }
  ]
}
The API response for the READ API looks as follows: JSON { "status": "succeeded", "createdDateTime": "2019-10-03T14:32:04Z", "lastUpdatedDateTime": "2019-10-03T14:38:14Z", "analyzeResult": { "version": "v3.0", "readResults": [ { "page": 1, "language": "en", "angle": 49.59, "width": 600, "height": 400, "unit": "pixel", "lines": [ { "boundingBox": [ 20,61,204,64,204,84,20,81], "text": "Hello world!", "words": [ { "boundingBox": [ 20,62,48,62,48,83,20,82], "text": "Hello", "confidence": 0.91 }, { "boundingBox": [ 51,62,105,63,105,83,51,83], "text": "world!", "confidence": 0.164 } ] } ] } ] } } Since both APIs provide bounding box coordinates, they can be used for visualization. For example, performing OCR on the abc.png in our images folders yields this:
Original image :

Image after OCR:

You can read more from the official documentation on their differences. Let's get our hands dirty now, shall we?
Ask the user for input
For a start, we will create a function ask_user_for_input() that asks a user to choose whether they want to invoke the Read API or the OCR API. The GetTextRead() function and the GetTextOcr() function only print out a statement but we will build on them as we go. Your main.py should contain: ```py import os
def GetTextOcr(file_path): """ Takes in a file and does OCR on the document and returns a string of the text extracted during OCR. :param file_path: :return: string """ try: print("This function invokes the OCR API on", file_path) except Exception as ex: print(ex)
def GetTextRead(file_path): """ Takes in a file extracts handwritten or printed text on the document and returns a string of the text extracted during OCR. :param file_path: :return: string """ try: print("This function invokes the READ API on", file_path) except Exception as ex: print(ex)
def ask_user_for_input():
""" Asks the user for input from the command line
""" try:
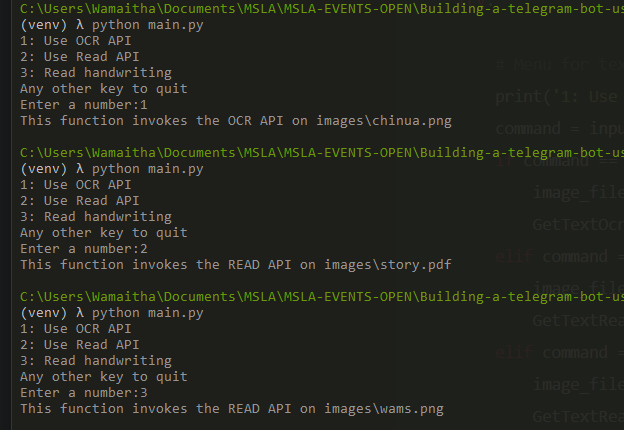
# Menu for text reading functions print('1: Use OCR API\n2: Use Read API\n3: Read handwriting\nAny other key to quit') command = input('Enter a number:') if command == '1': image_file = os.path.join('images', 'chinua.png') GetTextOcr(image_file) elif command == '2': image_file = os.path.join('images', 'story.pdf') GetTextRead(image_file) elif command == '3': image_file = os.path.join('images', 'wams.png') GetTextRead(image_file)
except Exception as ex: print(ex)
ask_user_for_input()
Run main.py using:
```shell
python main.py
You should get prompts to enter a number
Authenticating the azure cognitive client
The library imports and the azure cognitive client authentication code is as follows: ```py import os import time from matplotlib import pyplot as plt from PIL import Image, ImageDraw
Import namespaces
from azure.cognitiveservices.vision.computervision import ComputerVisionClient from azure.cognitiveservices.vision.computervision.models import OperationStatusCodes from msrest.authentication import CognitiveServicesCredentials
from dotenv import load_dotenv
Get Configuration Settings
load_dotenv() cog_endpoint = os.getenv('COG_SERVICE_ENDPOINT') cog_key = os.getenv('COG_SERVICE_KEY')
Authenticate Computer Vision client
credential = CognitiveServicesCredentials(cog_key) cv_client = ComputerVisionClient(cog_endpoint, credential)
def GetTextOcr(file_path): """ Takes in a file does OCR on the document and returns a string of the text extracted during OCR.
.... ``` Let's go over it line by line.
The os enables us to retrieve images from local directories.
We will need our code to sleep for a few seconds at some point. The time module helps with that.
Matplotlib offers a canvas for us to draw on
Pillow (PIL) enables us to read and draw on our images. We will be drawing bounding boxes to show where the text was extracted. This will be especially useful when visualizing what the cognitive service is doing behind the scenes
The azure ComputerVisionClient is responsible for all the OCR computations we will be doing
The azure computer vision models are advanced models trained to not only work on printed text but also handwritten. As we will see later, the OCR API does very poorly on handwritten data while the READ API is competent in decoding printed and handwritten text.
Last but not least, we import the CognitiveServicesCredentials that handles authenticating our code to azure using the key and endpoint we generated from the Azure portal.
Finally, we import load_dotenv. A python package is used to retrieve environmental variables.
Now that we have all the necessary libraries In place, we need to authenticate our computer vision client. The code just before the GetTextOcr() should now be as follows:
import os
import time
from PIL import Image, ImageDraw
from matplotlib import pyplot as plt

# Import namespaces
from azure.cognitiveservices.vision.computervision import ComputerVisionClient
from azure.cognitiveservices.vision.computervision.models import OperationStatusCodes
from msrest.authentication import CognitiveServicesCredentials

from dotenv import load_dotenv

# Get Configuration Settings
load_dotenv()
cog_endpoint = os.getenv('COG_SERVICE_ENDPOINT')
cog_key = os.getenv('COG_SERVICE_KEY')

# Authenticate Computer Vision client
credential = CognitiveServicesCredentials(cog_key)
cv_client = ComputerVisionClient(cog_endpoint, credential)


def GetTextOcr(file_path):
    """
    Takes in a file does OCR on the document and returns a string
    of the text extracted during OCR.
To authenticate the client, we get our environmental variables from the .env.
Note: The variable name being retrieved from the .env must be the same one passed to os.getenv(). Case sensitivity is observed. For example, the COG_SERVICE_ENDPOINT in the env must be the same as what is passed in the
py os.getenv('COG_SERVICE_ENDPOINT')
We then authenticate the computer vision by first passing our key to the CognitiveServicesCredentials that validate our key. That is then passed along to the ComputerVisionClient.
OCR API
We will start with the OCR API.
The full code for the GetTextOcr() looks as follows:
....
def GetTextOcr(file_path):
    """
    Takes in a file and does OCR on the document and returns a string
    of the text extracted during OCR.
    :param file_path:

    """
    try:
        print("This function invokes the OCR API on", file_path)
        # Use OCR API to read the text in the image
        with open(file_path, mode="rb") as image_data:
            ocr_results = cv_client.recognize_printed_text_in_stream(image_data)

        # Prepare image for drawing
        fig = plt.figure(figsize=(7, 7))
        img = Image.open(file_path)
        draw = ImageDraw.Draw(img)

        # All the words extracted will be stored as a list
        results = []

        # Process the text line by line
        for region in ocr_results.regions:
            for line in region.lines:

                # Show the position of the line of text
                l, t, w, h = list(map(int, line.bounding_box.split(',')))
                draw.rectangle(((l, t), (l + w, t + h)), outline='magenta', width=5)

                # Read the words in the line of text
                line_text = ''
                for word in line.words:
                    line_text += word.text + ' '
                print(line_text.rstrip())
                results.append(line_text.rstrip())

        # Save the image with the text locations highlighted if the image was ocrd
        if len(results) > 0:
            plt.axis('off')
            plt.imshow(img)
            # create output folder if doesnt exist
            if not os.path.exists('ocr-results'):
                os.makedirs('ocr-results')
            file_path = file_path.rsplit('\\', 1)[-1].rsplit('.', 1)[0]
            outputfile = f'ocr-results\\{file_path}-ocr_results.jpg'
            fig.savefig(outputfile)
            print('Results saved in', outputfile)
            # if there was no ocr decoded the results list will be empty
        if len(results) == 0:
            print(f'{file_path} IMAGE WAS NOT OCRD')


    except Exception as ex:
        print(ex)
....
Code break down: ```py
Use OCR API to read the text in the image
with open(file_path, mode="rb") as image_data: ocr_results = cv_client.recognize_printed_text_in_stream(image_data)
- The above code opens the image we are currently working on.
- Streams the image to the azure client that recognized the text in the image.
- The results from the stream are stored in ocr_results.

```py
        # Prepare image for drawing
        fig = plt.figure(figsize=(7, 7))
        img = Image.open(file_path)
        draw = ImageDraw.Draw(img)
Next, we initialize a matplotlib canvas (figure) and use the Draw() method from pillow to draw our image on the canvas.
     # All the words extracted will be stored as a list
        results = []
Initialize an empty list that will store all the words extracted from the image by the azure service.
        # Process the text line by line
        for region in ocr_results.regions:
            for line in region.lines:

                # Show the position of the line of text
                l, t, w, h = list(map(int, line.bounding_box.split(',')))
                draw.rectangle(((l, t), (l + w, t + h)), outline='magenta', width=5)

                # Read the words in the line of text
                line_text = ''
                for word in line.words:
                    line_text += word.text + ' '
                print(line_text.rstrip())
                results.append(line_text.rstrip())
The for loop starts by looping through each region from the ocr_results. Refer to the sample API response we highlighted when comparing the OCR and READ API. Every region has an array of lines in the region. Think of a line like a sentence. Every line comes with bounding boxes that we will be drawing on the image we duplicated on the matplotlib canvas. All the words extracted from each line are stored in the results list we had initialized. This means that if the image did not contain any words or the OCR API was unable to extract any words (remember that OCR performs poorly on handwritten text), the results list remains empty. This logic takes us to the next part of the code.
       # Save the image with the text locations highlighted if the image was ocrd
        if len(results) > 0:
            plt.axis('off')
            plt.imshow(img)
            # create output folder if doesnt exist
            if not os.path.exists('ocr-results'):
                os.makedirs('ocr-results')
            file_path = file_path.rsplit('\\', 1)[-1].rsplit('.', 1)[0]
            outputfile = f'ocr-results\\{file_path}-ocr_results.jpg'
            fig.savefig(outputfile)
            print('Results saved in', outputfile)
            # if there was no ocr decoded the results list will be empty
        if len(results) == 0:
            print(f'{file_path} IMAGE WAS NOT OCRD')
We first check the length of the results list. If the length is greater than 0, the image processed contained at least one line or one word that the API extracted. If this is the case, we save the image on our local directory. If no word was extracted on the image we simply print that the image did not contain any word the API could recognize. Run main.py and test the function:
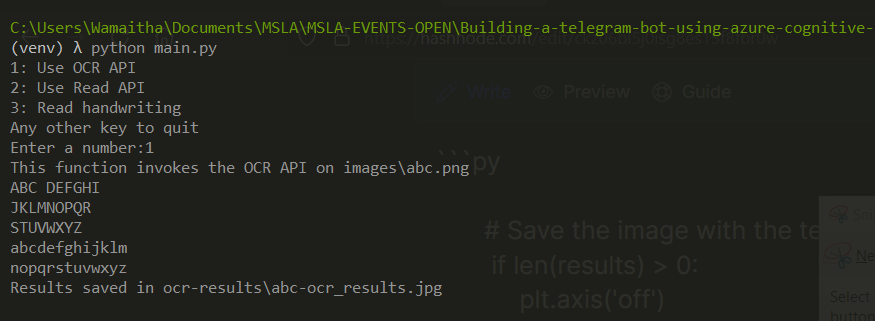
Results were as we had seen on the abc.png. Try out an image of your liking by changing the file name in the function we created for asking the user for input initially.
READ API
The GetTextRead() function implements the READ API. The full code for the function is as follows:
def GetTextRead(file_path):
    """
      Takes in a file extracts handwritten or printed text
       on the document and returns a string of the text extracted during OCR.
      :param file_path:
    """
    try:
        print("This function invokes the READ API on", file_path)
        results = []
        # Use Read API to read text in image
        with open(file_path, mode="rb") as image_data:
            read_op = cv_client.read_in_stream(image_data, raw=True)

        # Get the async operation ID so we can check for the results
        operation_location = read_op.headers["Operation-Location"]
        operation_id = operation_location.split("/")[-1]

        # Wait for the asynchronous operation to complete
        while True:
            read_results = cv_client.get_read_result(operation_id)
            if read_results.status not in [OperationStatusCodes.running, OperationStatusCodes.not_started]:
                break
            time.sleep(1)

        # If the operation was successfuly, process the text line by line
        if read_results.status == OperationStatusCodes.succeeded:
            for page in read_results.analyze_result.read_results:
                for line in page.lines:
                    print(line.text)
                    results.append(line.text)
        print('Reading text in {}\n'.format(file_path))

        return results
    except Exception as ex:
        print(ex)
Going over the code line by line:
results =[]
Initialise empty list that will store all the extracted text in the image or document ```py
# Use Read API to read text in image with open(file_path, mode="rb") as image_data: read_op = cv_client.read_in_stream(image_data, raw=True)
# Get the async operation ID so we can check for the results operation_location = read_op.headers["Operation-Location"] operation_id = operation_location.split("/")[-1]
# Wait for the asynchronous operation to complete while True: read_results = cv_client.get_read_result(operation_id) if read_results.status not in [OperationStatusCodes.running, OperationStatusCodes.not_started]: break time.sleep(1) ``` We mentioned that the READ API works asynchronously so we need a mechanism that waits for the whole process to complete. We first pass the image to our computer vision client. In order to make sure the READ API is done, we start a while loop that only exits when the status code is either SUCCEEDED or FAILED. You can learn more about the operational codes here. Once the code breaks, the results from the READ API will be stored in the read_results variable.
 # If the operation was successfuly, process the text line by line
        if read_results.status == OperationStatusCodes.succeeded:
            for page in read_results.analyze_result.read_results:
                for line in page.lines:
                    print(line.text)
                    results.append(line.text)
        print('Reading text in {}\n'.format(file_path))

        return results
    except Exception as ex:
        print(ex)
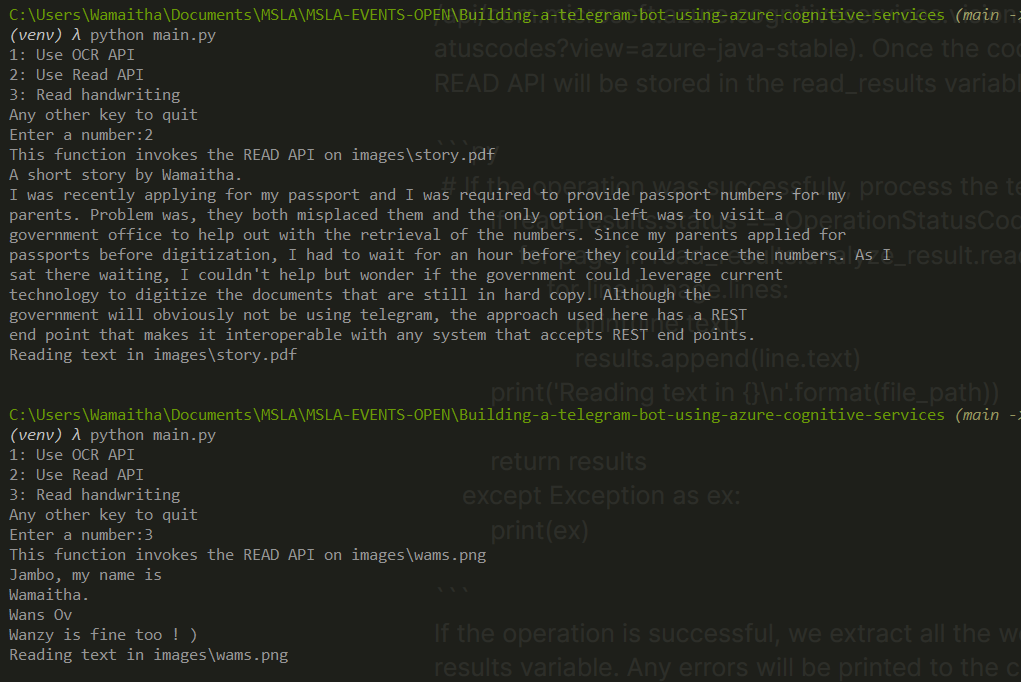
If the operation is successful, we extract all the words and append them in the results variable. Any errors will be printed to the console as exceptions. Since the READ API works on both documents and images, we will test it out using the story.pdf and the handwritten file wams.py.
Test it out :
python main.py
You should get the following results:
The full code for main.py:
import os
import time
from PIL import Image, ImageDraw
from matplotlib import pyplot as plt

# Import namespaces
from azure.cognitiveservices.vision.computervision import ComputerVisionClient
from azure.cognitiveservices.vision.computervision.models import OperationStatusCodes
from msrest.authentication import CognitiveServicesCredentials
from dotenv import load_dotenv


# Get Configuration Settings
load_dotenv()
cog_endpoint = os.getenv('COG_SERVICE_ENDPOINT')
cog_key = os.getenv('COG_SERVICE_KEY')

# Authenticate Computer Vision client
credential = CognitiveServicesCredentials(cog_key)
cv_client = ComputerVisionClient(cog_endpoint, credential)


def GetTextOcr(file_path):
    """
    Takes in a file and does OCR on the document and returns a string
    of the text extracted during OCR.
    :param file_path:

    """
    try:
        print("This function invokes the OCR API on", file_path)
        # Use OCR API to read text in image
        with open(file_path, mode="rb") as image_data:
            ocr_results = cv_client.recognize_printed_text_in_stream(image_data)

        # Prepare image for drawing
        fig = plt.figure(figsize=(7, 7))
        img = Image.open(file_path)
        draw = ImageDraw.Draw(img)

        # All the words extracted will be stored as a list
        results = []
        # Process the text line by line
        for region in ocr_results.regions:
            for line in region.lines:

                # Show the position of the line of text
                l, t, w, h = list(map(int, line.bounding_box.split(',')))
                draw.rectangle(((l, t), (l + w, t + h)), outline='magenta', width=5)

                # Read the words in the line of text
                line_text = ''
                for word in line.words:
                    line_text += word.text + ' '
                print(line_text.rstrip())
                results.append(line_text.rstrip())

        # Save the image with the text locations highlighted if the image was ocrd
        if len(results) > 0:
            plt.axis('off')
            plt.imshow(img)
            # create output folder if doesnt exist
            if not os.path.exists('ocr-results'):
                os.makedirs('ocr-results')
            file_path = file_path.rsplit('\\', 1)[-1].rsplit('.', 1)[0]
            outputfile = f'ocr-results\\{file_path}-ocr_results.jpg'
            fig.savefig(outputfile)
            print('Results saved in', outputfile)
            # if there was no ocr decoded the results list will be empty
        if len(results) == 0:
            print(f'{file_path} IMAGE WAS NOT OCRD')


    except Exception as ex:
        print(ex)


def GetTextRead(file_path):
    """
      Takes in a file and extracts handwritten or printed text
       on the document and returns a string of the text extracted during OCR.
      :param file_path:
    """
    try:
        print("This function invokes the READ API on", file_path)
        results = []
        # Use Read API to read text in image
        with open(file_path, mode="rb") as image_data:
            read_op = cv_client.read_in_stream(image_data, raw=True)

        # Get the async operation ID so we can check for the results
        operation_location = read_op.headers["Operation-Location"]
        operation_id = operation_location.split("/")[-1]

        # Wait for the asynchronous operation to complete
        while True:
            read_results = cv_client.get_read_result(operation_id)
            if read_results.status not in [OperationStatusCodes.running, OperationStatusCodes.not_started]:
                break
            time.sleep(1)

        # If the operation was successfuly, process the text line by line
        if read_results.status == OperationStatusCodes.succeeded:
            for page in read_results.analyze_result.read_results:
                for line in page.lines:
                    print(line.text)
                    results.append(line.text)
        print('Reading text in {}\n'.format(file_path))

        return results
    except Exception as ex:
        print(ex)


def ask_user_for_input():
    """
    Asks the user for input from the command line

    """
    try:

        # Menu for text reading functions
        print('1: Use OCR API\n2: Use Read API\n3: Read handwriting\nAny other key to quit')

        command = input('Enter a number:')
        if command == '1':
            file_path = os.path.join('images', 'abc.png')
            GetTextOcr(file_path)
        elif command == '2':
            file_path = os.path.join('images', 'story.pdf')
            GetTextRead(file_path)
        elif command == '3':
            file_path = os.path.join('images', 'wams.png')
            GetTextRead(file_path)


    except Exception as ex:
        print(ex)


ask_user_for_input()
So far we've been hardcoding the image we are processing, but we need to make the awesome project accessible to others. We will implement a flask API endpoint that will be used by telegram. You can use the endpoint with any frontend framework that accepts REST
Our Flask endpoint will reside in app.py. The bare-bone code on app.py is :
import os
from dotenv import load_dotenv
from flask import Flask
from telegram.ext import Updater, MessageHandler, Filters
from telegram.ext import CommandHandler
from main import GetTextRead
load_dotenv()
TELEGRAM_TOKEN = os.getenv('TELEGRAM_TOKEN')
updater = Updater(token=TELEGRAM_TOKEN, use_context=True)
dispatcher = updater.dispatcher
app = Flask(__name__)
@app.route('/')
def extract_text_from_telegram(update, context):
try:
print("Uploading to telegram ...")
except Exception as ex:
update.message.reply_text("Upload an image with text")
print(ex)
# set up the introductory statement for the bot when the /start command is invoked
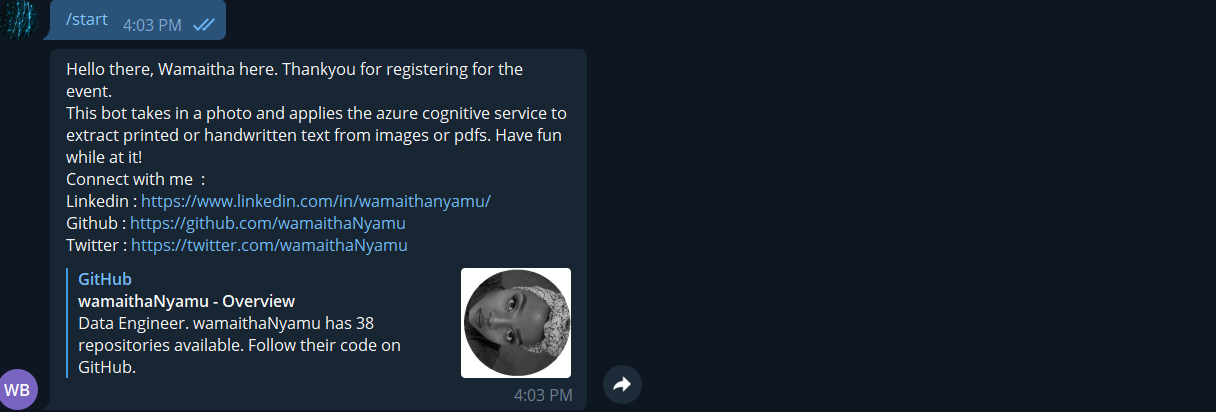
def start(update, context):
try:
chat_id = update.effective_chat.id
context.bot.send_message(chat_id=chat_id,
text="Hello there, Wamaitha here. Thank you for registering for the event. \n"
"This bot takes in a photo and applies the azure cognitive service to extract "
"printed or handwritten text from images or pdfs. Have fun while at it! \n "
"Connect with me :\n"
"Linkedin : https://www.linkedin.com/in/wamaithanyamu/\n"
"Github : https://github.com/wamaithaNyamu \n"
"Twitter : https://twitter.com/wamaithaNyamu \n")
except Exception as ex:
print(ex)
# run the start function when the user invokes the /start command
dispatcher.add_handler(CommandHandler("start", start))
# Handle messages from the user
dispatcher.add_handler(MessageHandler(Filters.all, extract_text_from_telegram))
updater.start_polling()
if __name__ == '__main__':
app.run(debug=True)
Let's go over the code line by line :
We import the os and dotenv that will be used to retrieve our environmental variable for the telegram token
Import flask that will be used to make an endpoint
Import telegram.ext and helper functions that will be used to communicate with python from telegram
We will be using the READ API since its more comprehensive than the OCR API, as such we need to import it from our main.py
The extract_text_from_telegram function will be populated with the logic needed to filter out messages sent by the user whether they uploaded an image or a pdf. More on this next! For now we only print a statement to the console
The start function is what you see when you start the bot
The dispatcher is what interacts with telegram. the first dispatcher handles the /start command from the user. The other dispatcher will handle any incoming messages from telegram and then invoke the extract_text_from_telegram function.
Lastly we poll the updater to check if there is any message from the user so that we can process it
We then run the flask app
To run the app.py as is :
On Unix Bash (Linux, Mac, etc.):
export FLASK_APP=app
flask run
On Windows CMD:
set FLASK_APP=app
flask run
On Windows PowerShell:
$env:FLASK_APP = "app"
flask run
The full code for our app.py is as follows: ```py import os import pathlib
from dotenv import load_dotenv from flask import Flask import requests from telegram.ext import Updater, MessageHandler, Filters from telegram.ext import CommandHandler
from our main.py
from main import GetTextRead
load_dotenv()
TELEGRAM_TOKEN = os.getenv('TELEGRAM_TOKEN') updater = Updater(token=TELEGRAM_TOKEN, use_context=True) dispatcher = updater.dispatcher
app = Flask(name)
def file_handler(update): try: print(update.message) file_id = '' if len(update.message.photo) == 0 and update.message.document.file_id: print("WE HAVE A FILE", update.message.document.file_id) file_id = update.message.document.file_id elif len(update.message.photo) > 0: print("WE HAVE AN IMAGE", update.message.photo[-1].file_id) file_id = update.message.photo[-1].file_id return file_id
except Exception as e: print("Handler exception",e)
@app.route('/') def extract_text_from_telegram(update, context): """
:param update: checks for updates from telegram :param context: :return: """ try:
file_name ='' print("Uploading to telegram ...", ) file_id = file_handler(update) print("FILE ID", file_id)
if file_id: update.message.reply_text("Processing file...") file_path = f'https://api.telegram.org/bot{TELEGRAM_TOKEN}/getFile?file_id={file_id}' img = requests.get(file_path).json() img = img['result']['file_path'] # img path: photos/file_35.jpg print("img path:", img) file_image = f'https://api.telegram.org/file/bot{TELEGRAM_TOKEN}/{img}' response = requests.get(file_image) # split_img path: file_35.jpg split_img = img.rsplit('/', 1)[-1] print("split_img path:", split_img)
# File Extension: .jpg file_extension = pathlib.Path(split_img).suffix print("File Extension: ", file_extension) # file_35.jpg-AgACAgQAAxkBAAIBS2H5FN20IK2ArluFlw_E_MiY2bw.jpg file_name = f'{split_img}-{file_id}.{file_extension}'
file = open(f'{file_name}', "wb") file.write(response.content) file.close()
user_image_text_results = GetTextRead(file_name) print("results:", user_image_text_results) if len(user_image_text_results) > 0: results = ' '.join(str(e) for e in user_image_text_results) print(results) update.message.reply_text("Thank you for your patience. This is what I extracted:") update.message.reply_text(results) else: update.message.reply_text( "Unfortunately, this image does not contain any printed or handwritten text. ")
else: update.message.reply_text("Upload an image with text")
if os.path.exists(file_name): os.remove(file_name) print(file_name, ' deleted!') else: print(f"The file {file_name} does not exist") except Exception as ex: update.message.reply_text("Upload an image with text") print(ex)
set up the introductory statement for the bot when the /start command is invoked
def start(update, context): """ /start command on telegram :param update: :param context: :return: """ try: chat_id = update.effective_chat.id context.bot.send_message(chat_id=chat_id, text="Demo time!!!")
except Exception as ex: print(ex)
run the start function when the user invokes the /start command
dispatcher.add_handler(CommandHandler("start", start))
dispatcher.add_handler(MessageHandler(Filters.all, extract_text_from_telegram)) updater.start_polling()
if name == 'main': app.run(debug=True)
Going over the app.y, we added code to the extract_text_from_telegram function and also made a utility function file_handler.
The file_handler function takes in the message from the user and determines whether the message has an image or a file and then returns an id of either the image id or the file id.
In the extract_text_from_telegram function, we call on the file_hanlder function to give us an id of the current message being sent by the user.
If there is a file id, we request a telegram for that file and store it on our local machine. The image or file is then passed to the Get_Read function that we worked on in the main.py. The extracted text we get from Azure is sent back to the user on telegram. If azure did not find any texts on the provided file or image, we let the user know that we found no text on the supplied file or image.
Lastly, the file or image we saved from telegram is then deleted from our system.
<iframe src="https://giphy.com/embed/3o6Mbbs879ozZ9Yic0" width="480" height="366" frameBorder="0" class="giphy-embed" allowFullScreen></iframe><p><a href="https://giphy.com/gifs/season-7-the-simpsons-7x4-3o6Mbbs879ozZ9Yic0">via GIPHY</a></p>
Results from telegram:


# HOSTING ON HEROKU
We need to make sure the rest of the world can use our bot even we shut down our computer. We will be hosting on heroku.
You will need to have the heroku CLI and git installed on your system. If you do not have the CLI you can install it using npm:
```shell
npm install -g heroku
Installation instructions can be found here incase you get stuck.
Git installation instructions are found here
Create the Procfile
Heroku uses a special file that defines the commands we want to run when heroku launches our application. In this case we need a Procfile that tells Heroku to start our flask app. Add the Procfile to your project root folder. The folder structure should now be as follows: ProjectFolder |main.py |app.py |.env |.gitignore | requirements.txt | Procfile └───images │ │ abc.png │ │ chinua.jpg │ │ story.pdf │ │ wams.png
The Procfile does not have a file extension
Add the following to your Procfile
web: python app.py
Create the Heroku App
Ensure you have the CLI and Git installed on your system
Create a Heroku app using the command
heroku create unique_name_for_your_bot
Alternatively, you can let Heroku create a unique name for your bot by running
heroku create
Running the command gives two URLs. One is the application URL and the other is a Git URL.
in your .env file add the application URL, we will need it later. Your .env should now look as follows:
COG_SERVICE_ENDPOINT=your_azure_endpoint_goes_here
COG_SERVICE_KEY=your_azure_key_goes_here
TELEGRAM_TOKEN=your_telegram_token_goes_here
BOT_URL=your_heroku_application_url_goes_here
PORT=5000
Python Buildpack
Since our application runs on Python, we need to set our Heroku environment to use python. Heroku does this using buildpacks. Add the python buildpack using:
heroku buildpacks:set heroku/python
Modifying the app.py file
Before we can deploy the code to Heroku we need to change a few things in our app.py code
...
dispatcher.add_handler(MessageHandler(Filters.all, extract_text_from_telegram))
# updater.start_polling() <--- comment this out

# add the webhook code
updater.start_webhook(listen="0.0.0.0",
                      port=int(os.environ.get('PORT', 8080)),
                      url_path=TELEGRAM_TOKEN,
                      webhook_url=os.getenv('BOT_URL') + TELEGRAM_TOKEN
                      )
We are switching from polling to webhooks. Polling asks telegram if the user has sent any new message every few seconds while a webhook waits until the user sends a message to act on it. Thus we are telling telegram to listen to any new messages from the Heroku application URL we provide.
Deploying
With git already installed, you need to first initialize git in the repo then push the code to Heroku. Run the following commands sequentially in your terminal:
Make sure to add .env file in your .gitignore
Initialise git
shell git initAdd all files except those listed in the .gitignore to git
shell git add .Commit
shell git commit -m "Done with my telegram azure bot "Deploy
git push heroku main
Adding envs to Heroku
Log in to your Heroku dashboard and go to the application you created. it will be under the same name you gave Heroku or Heroku created for you. On the settings tab, scroll and click on Reveal Config vars.
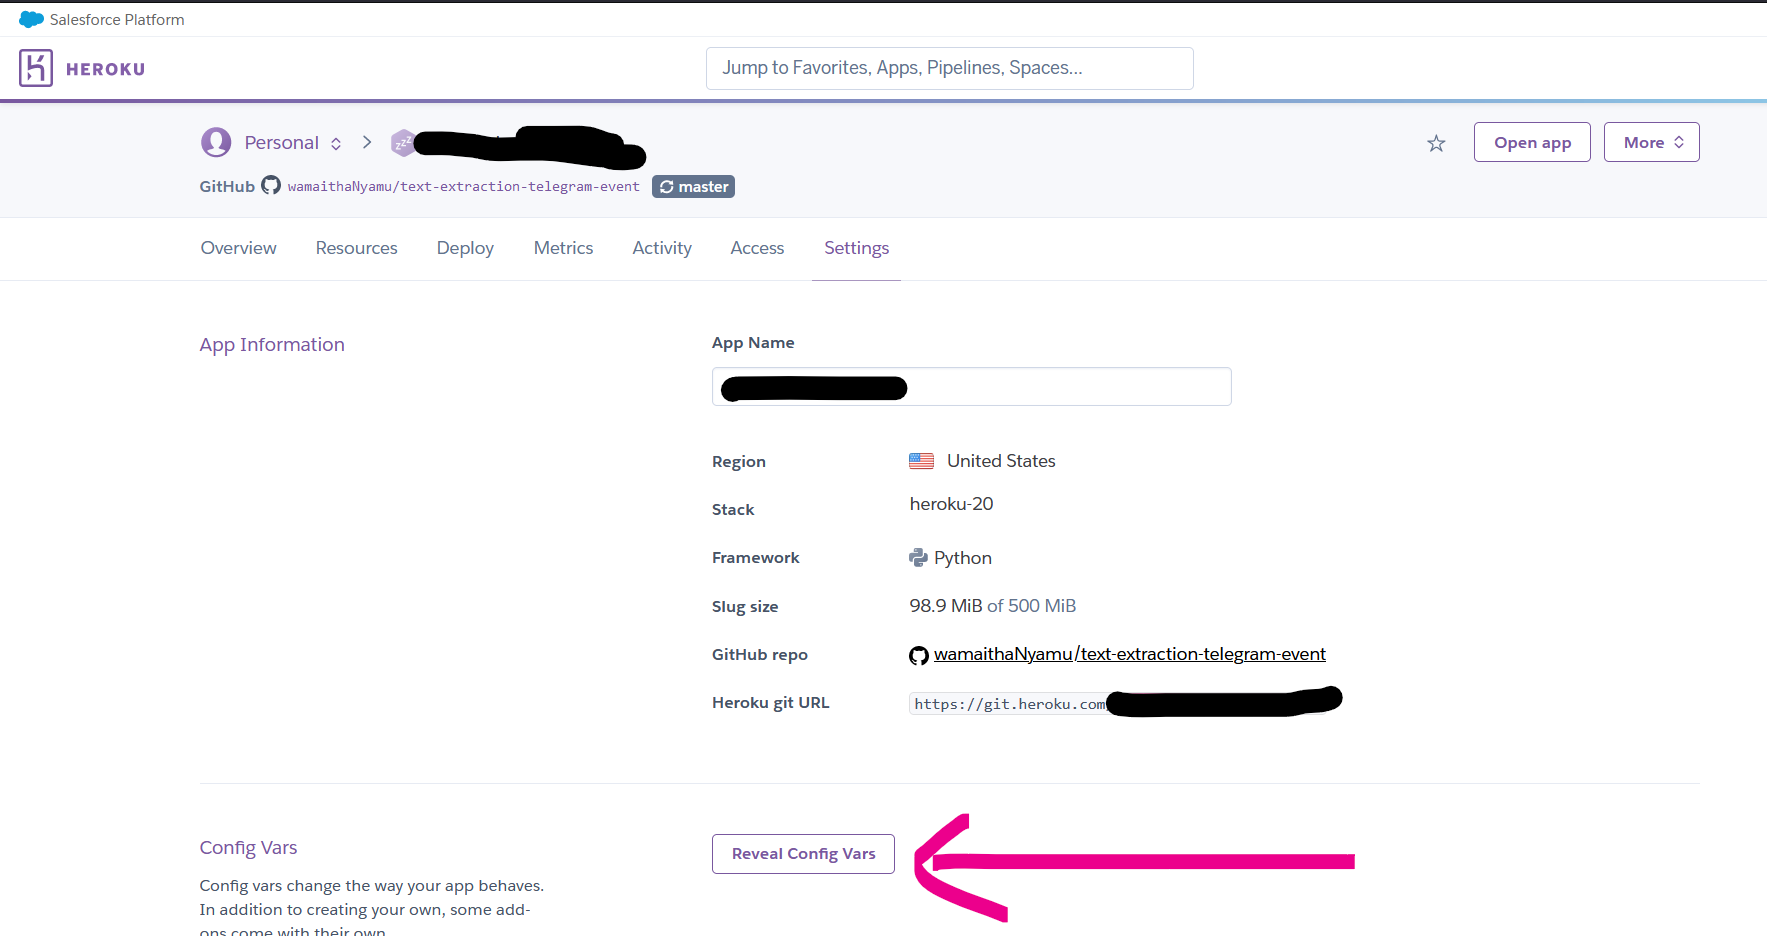
From there just copy-paste all the vars in your .env.

Conclusion
Good job! You did it. You should now have the app running on Heroku. Note that the free dynos on Heroku sleep when they are idle for a while thus you may find that the next time you use your telegram bot you may have delays. Worry not! The dynos take a minute to go back up online.
Full code can be found here